Showing posts with label crafts. Show all posts

Thursday, August 1, 2013

Top Ten {free!} Dress Pattern Round Up!

I am effectively obsessed with sewing for Liliana. Her fall wardrobe is well underway, and I have about 250 projects up in the air right now. There are literally hundreds of amazing dress patterns available online. Below are a few of my favourites.  


^^Little Geranium Dress | Made by Rae^^


^^Blackbird Tunic | Schwin & Schwin^^


^^Ruffled Pillowcase Dress | Simply Modern Mom^^


^^Embroidered Denim Jumper | The Purl Bee^^


^^Ruffle Clover Dress | No Big Dill^^


^^Infant Peasant Dress | Sew Much Ado^^


^^Ice Cream Social Dress | Craftiness is Not Optional^^


^^Reversible Wrap Dress | The Crafty Cupboard^^


^^Kimono Dress | Sew Mama Sew^^


Crossover Pinafore | Smashed Peas and Carrots

It was so hard to narrow my favourites down for this feature, that you can expect Part Two of this series next week! Get stitching!

Here's where I'm Linking Up:

Thursday, July 4, 2013

Super Easy DIY Strapless Maxi Dress

One of the items on my 30 Before Thirty list is to sew (and wear) a dress for myself. I absolutely adore sewing, but I'm still pretty novice. I'm so happy to report that this dress is absolutely easy-peasy. It's literally a tube made of jersey with two hems and elastic ruching.


The process:

N.B. I used jersey for this project. You'll notice with any knit fabric it stretches more in one direction than the other. You want the stretchy side of the fabric to run horizontally across your body. That way the dress stretches over you and acts as an elastic. Jersey is also usually reversible so as long as the stretchy side is running across your body, you're good to go. There is no "right" or "wrong" side of the fabric

1. I measured myself across the chest, starting and stopping in the centre of my armpits. Since the fabric is a stretch jersey, I didn't leave too much of a seam allowance at the top. This dress is strapless and I didn't want to use elastic to keep it up, or to add too much bulk. Then I measured from my armpit to the floor and added 2 inches for seam allowance and to account for shrinking in the wash.  

2. Then I drew my pattern directly on my fabric. First I plotted out my "across the chest" measurement at the top of the fabric, then I plotted out the length of my dress. I drew a diagonal line to connect the top measurement to the bottom. Effectively my pattern looked like this (x2 one for the front of the dress, and one for the back):      
The line down the centre at the top is where the elastic is going to go for my ruched top. This line is only on the front.

3. Sew the back and the front pieces of the dress together by stitching the long sides of the dress. You will have a long, conical shaped tube when you're done. Since this is not the stretchy side of the fabric, you can use a plain old straight stitch on your machine. 

4. Try the dress on. Is it nice and snug? If yes, continue to Step 5, if not repeat Step 4, taking out some of the width as you make a bigger seam.

5. Once the dress fits nice and snug, fold the bottom hem of the dress under and topstitch it in place. Do the same with the top, obviously ensuring that your hem will not be visible from the outside of the dress. Since this is the stretchy side of the material, be sure to use a knit stitch. Your machine will have one for sure, just consult the manual. It will ensure lots of stretch in the fabric. If you just use a straight stitch it will snap.

6. Take your piece of elastic. I used about 4 inches, but if your bust is larger you may want to use more...conversely if it's smaller, you may want to use less. Line the elastic up with the top hem of your dress, right in the middle of the bust. Fold the dress in half to find where this is, if you're not sure.

7. Pin your elastic vertically (as in the picture of the pattern) and drop your presser foot. Drop the needle into the elastic carefully before you begin sewing. Once the needle has secured the elastic, pull it tight (ONLY the elastic, NOT the fabric). Keep that tension on the elastic as you sew it in place. The tighter you pull, the more ruching you'll have.

8. You're done sewing! Now to Ombré-fy. I used these instructions, by RIT. The effect wasn't quite as "Ombré" as I'd like, but I think if you use more than one package of dye and vary the amount of saturation as you prep the dye, that would be more effective.


^^Without the belt this is the perfect "buffet dinner" dress^^


^^With a belt. I worked with what I had...Brown would have been preferable.^^


Here's where I'm Linking Up:

Thursday, November 29, 2012

Mini Stocking Advent Calendar


I'm basically in love with Advent calendars. I've been making semi-permanent iterations for the past several years...each one lovely in and of itself, but not quite "perfect." Then I found this version at Crate and Barrel. Obviously one hundred dollars for a few pieces of felt and some string is, if nothing else, a wee bit optimistic so I naturally decided to make my own. 


You will need:
*felt in coordinating colours (I used pinks and cream)
*embroidery floss or iron-on felt numbers
*sewing machine, pins etc
*twine

Step One:
Copy and paste the pattern into Microsoft Word or your preferred program. Re-size it to the desired size of your stockings.

Step Two:

Step Three:
Stitch numbers one to twenty four onto each of your stockings using a basic back stitch. If you don't know how to back stitch watch this video first. If you are using iron-on felt numbers, adhere them here according to manufacturer's instructions.


Step Four:
You can do this step by hand or by machine.

Step Five:

Step Six:
String them up and admire!

You could fill these with candy, little trinkets or my personal favourite: a little daily family activity to get you all in the spirit. For great family-friendly ideas check out Andrea's Quiet Fish blog.

Wednesday, November 21, 2012

Cashmere Pocket Hand Warmers


Felting old wool sweaters you aren't going to be wearing anymore is a great way to recycle and repurpose materials. I am a hopelessly horrendous knitter, but using felt allows me to create "knitted" items easily and without any unnecessary knitting needle-related injuries! It's incredibly easy to felt a wool sweater. If you're like me with laundry, chances are you've done it once or twice already completely inadvertently. 
                         
How to Felt a Wool Sweater

You will need:
- several 100% wool sweaters (no acrylics or blends)
- washer and dryer
- laundry soap

Directions:
- Wash the sweaters along with a load of your regular laundry on HOT setting with a COLD rinse. Use laundry soap/ detergent as usual. The friction provided by the other items in the washer help the felting process. Don't use too much water. The more friction, the better.
- Dry the sweaters along with the rest of the load on HIGH.
- Test the sweater is felted by cutting a snip into the fabric. If it frays, toss it back into the washer for another cycle or two. If it holds a crisp edge, you've got yourself a piece of felted wool.  

These Felted Cashmere Pocket Hand warmers would make an excellent teacher, hostess or thank you gift. As a teacher, I can attest to how much they are appreciated on those blustery January yard duties. Include a pretty tag explaining how to use them, and you're done!


**Repeat the entire process with the other hand warmer**
Heating and Use:
Heat in the microwave on HIGH for 30 second intervals until desired temperature is reached. Do not exceed 2 minutes or rice may burn. Place one warmer in each pocket and enjoy the warm, toasty experience as you brave another chilly Canadian winter. 


Saturday, November 17, 2012

Crafting Your Way to Christmas: Cute, Plushy Owl Tutorial

via favim.com
This cute little plush owl is the first in my "Crafting Your Way to Christmas" series. I'll be featuring crafts I've done (that you can do too!) as well as free printables, recipes and ideas I've culled to get yourself into the Christmas spirit. I have tons of decorating and gift ideas in store, so check back often!

This project was inspired by this adorable owl caddy by Three Sprouts. We got it as a gift for Baby Dragon and I loved the simple, clean lines. I thought the design would be totally easy to turn into a plush toy...and I was right! Follow along and see how I did it.


You will need:
three coordinating pieces of quilting weight cotton
two pieces of felt (I used cream and brown)
basic sewing accouterments
fibre fill of your choice 


READ: From the first copy of the pattern cut all the pieces except for the wing. Cut the outer eye piece slightly larger than in the pattern (see picture below). From the second copy, draw and cut the wing as indicated in the diagram above. Cut the inner eye piece slightly larger and without the notch. It should just be a plain circle. This will be the second layer of the eye. Our version has a three layer eye, while the original only has a two-layer eye.


You should have all of the above pieces. Before you continue, make sure! 


This little guy will be waiting for baby girl under the Christmas tree on her first Christmas morning...I know she won't remember it, but I'm kinda excited!!

Saturday, November 10, 2012

Tutorial: Ribbon Blanket for Baby

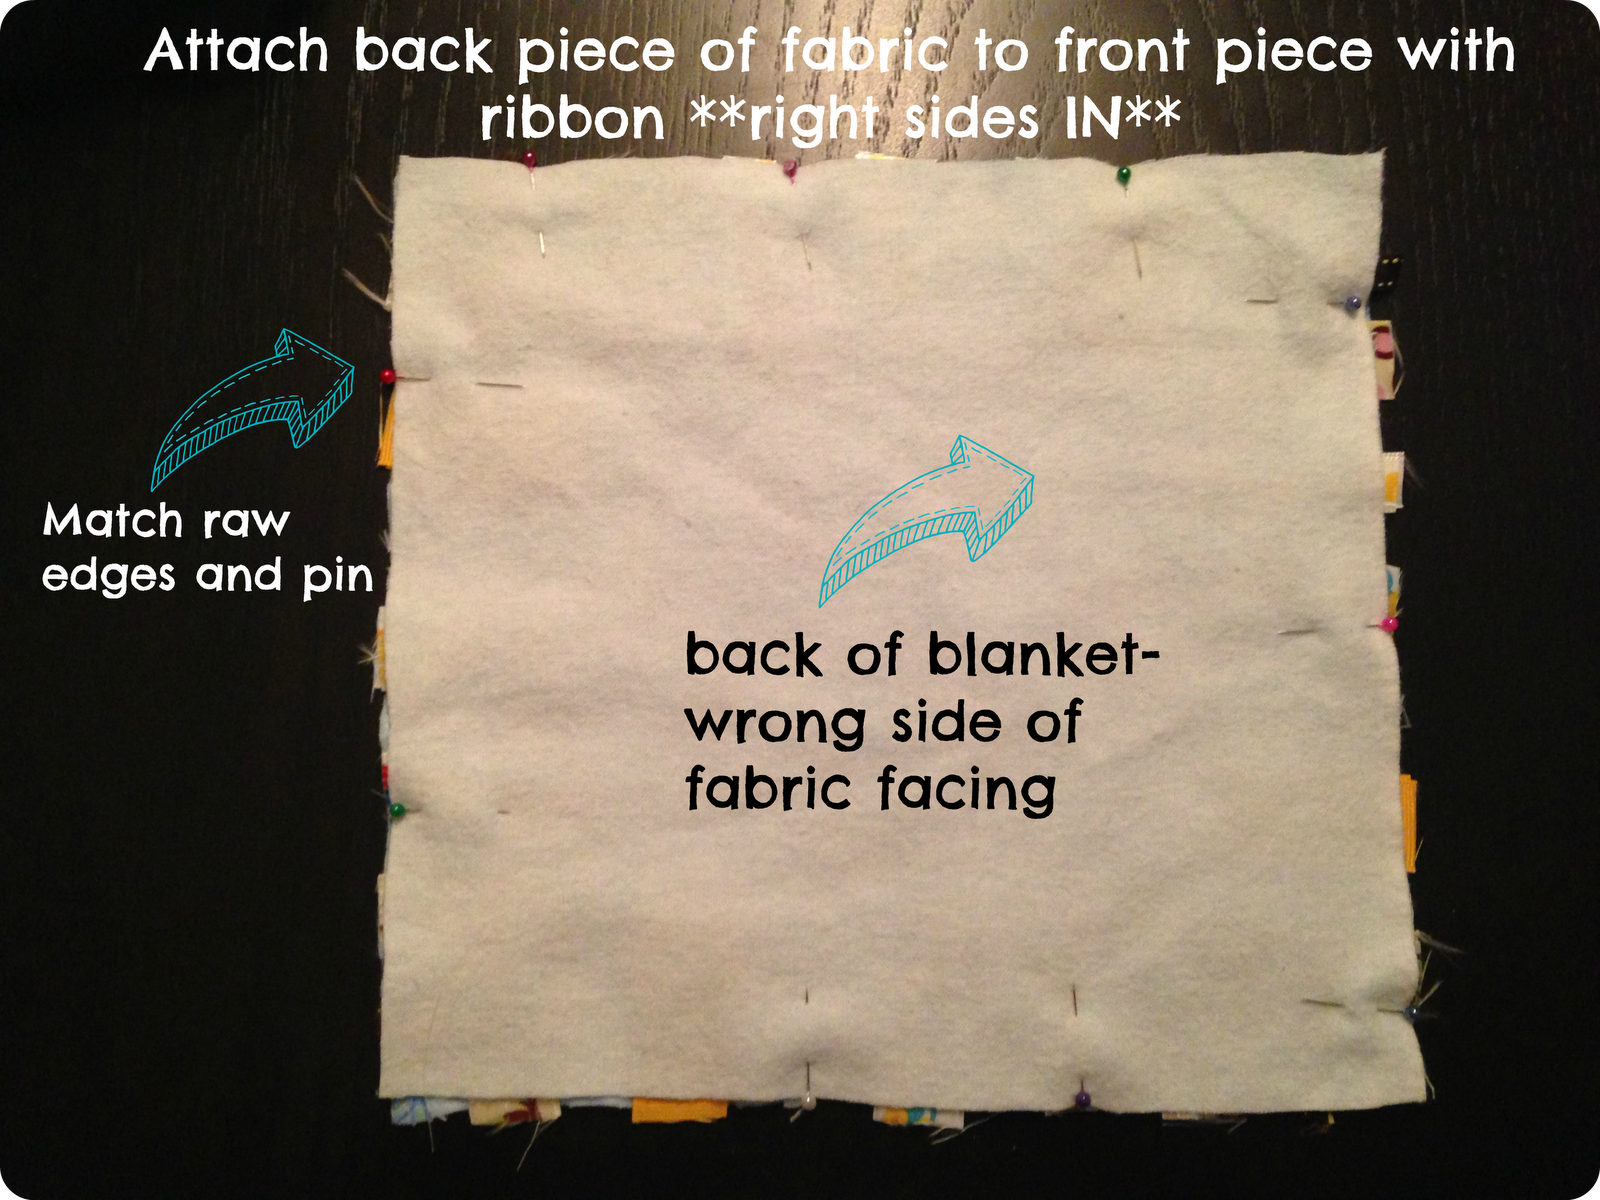
These little ribbon blankets (also called tag blankets) are a super-cute handmade baby shower gift idea. They are a nice sensory toy for young babies because they are light, easy to grasp and full of different textures. You can use any fabric and ribbon you have on hand. The finished blanket can be any size, as can the ribbon tags- no need to be too precious here with exact measurements. I recommend using a soft flannel, fleece or minky for the blanket in coordinating fabrics and a variety of different sizes and textures of ribbon to keep it interesting. Since you know this is going into baby's mouth, I highly recommend at least a double row of top stitching to secure the ribbons. 

One of my friends got a handmade ribbon blanket for her baby girl and to quote her: "It's kind of her favourite thing." Let's get started!     


You Will Need:


Instructions:


Finished!